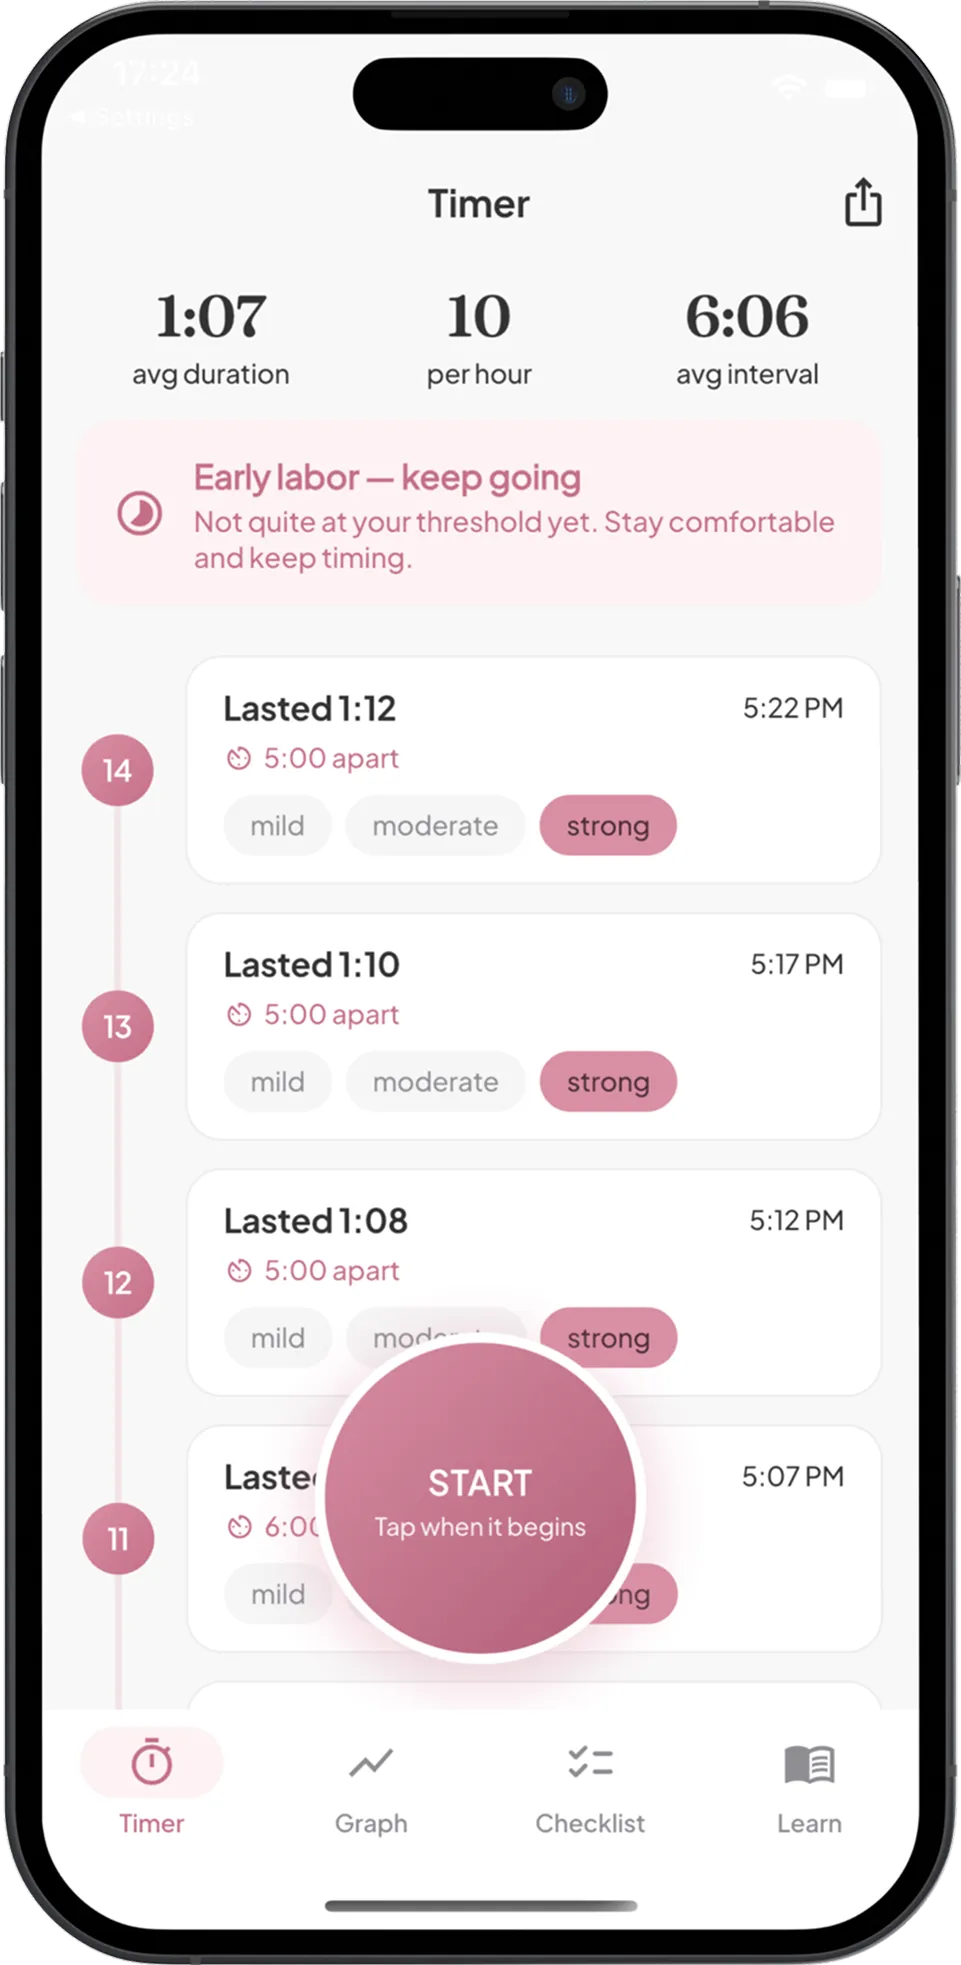
Knowing how to time contractions properly makes the difference between a confident call to your midwife and a fuzzy, uncertain one. Two measurements matter: how long each contraction lasts and how far apart they’re coming. They’re measured differently, and mixing them up is the most common source of confusion when parents call a triage line.
Most guides explain what 5-1-1 means. Far fewer walk through the actual step-by-step mechanics of timing, what to record between contractions, and how to read your own log in real time. This guide covers the how-to: what to press and when, what to write down, and what a consistent pattern looks like as labor develops.
To time contractions, start the timer when tightening begins and stop when the uterus fully relaxes. That’s the duration. The interval is measured start-to-start: from the beginning of one contraction to the beginning of the next. Track at least 3 contractions in a row and log for 60 minutes to identify a pattern your provider can use.
The Two Measurements: Duration and Interval
When timing contractions for labor, two separate numbers tell the story. Duration measures how long a single contraction lasts: from the first tightening to the moment the uterus fully releases. In early labor, contractions often last 30 to 45 seconds, according to NHS guidance on signs of labour. By active labor, duration typically stretches to 60 to 90 seconds. Interval measures how far apart contractions are coming, specifically from the start of one contraction to the start of the next. Most people instinctively measure end-to-start (the rest period between contractions), but providers use start-to-start. If a contraction begins at 2:00pm, lasts 65 seconds, and the next begins at 2:05pm, the interval is 5 minutes even though there were only about 3 minutes and 55 seconds of rest in between. The HSE advises timing at least 3 contractions in a row to get a reliable reading, since single measurements can mislead.
Together, the two measurements give a fuller picture than either one alone. A contraction that lasts 70 seconds but arrives every 12 minutes is a different situation from one that lasts 60 seconds and arrives every 5 minutes. The combination of duration, interval, and how long the pattern has held is what your provider is trying to piece together.
Providers typically ask three questions when you call: how often contractions are coming, how long they’re lasting, and how long that pattern has been consistent. Duration, interval, and tracking window are the three answers behind those questions.
How to Time Contractions, Step by Step
The mechanics are simple to describe and a bit harder to execute when you’re in the middle of a contraction. Here’s the process:
-
Press start when tightening begins. The start of a contraction can be subtle at first: a tightening in the lower abdomen, lower back, or both. Don’t wait until it feels clearly painful. The beginning is when it starts to build.
-
Press stop when the uterus fully releases. Wait until the sensation completely fades. Many people stop the timer too early, when the intensity is tapering off but hasn’t finished. The end of a contraction is a full release, not just the peak fading.
-
Record the duration. That’s the time from start to stop. 45 seconds, 58 seconds, 72 seconds: write them all down, or let an app log them automatically.
-
Note when the next contraction begins. The interval is the time from the start of the first contraction to the start of the second. If the first began at 2:00 and the second begins at 2:08, the interval is 8 minutes.
-
Repeat across at least 3 contractions before drawing any conclusions. After 10 or 15, you’ll have enough data to see whether a pattern is forming.
One useful habit: start tracking when contractions feel consistent enough to time, then keep going for a full 60 minutes before calling. That window shows whether the pattern is holding, shortening, or fluctuating.
A common mistake is measuring end-to-start instead of start-to-start for the interval. A contraction lasting 60 seconds that ends at 2:04 and is followed by a contraction starting at 2:08 has a 2-minute rest period, but a 4-minute start-to-start interval. The number to report to your provider is 4 minutes, not 2.
What to Write Down
A simple paper log works well: four columns for start time, end time, duration, and interval. That’s enough for a useful record.
An hour of tracking gives your provider something specific. Sharing “10 contractions over the past hour, averaging 7 minutes apart and lasting around 55 seconds” is far more useful than “they’re getting closer.” Providers hear vague descriptions often; a time-stamped log tells them something precise.
A few additional observations are worth having ready alongside the timing data:
- Whether intensity is building. Contractions that stay at a consistent level for 2 hours without increasing differ from contractions that are clearly getting stronger.
- Whether your water has broken. A gush or trickle of fluid is a reason to contact your provider regardless of contraction timing. ACOG’s patient guidance on labor includes ruptured membranes as a contact signal separate from contraction pattern.
- Where you feel them. Some people feel contractions primarily in the back; others feel them across the front. Worth noting before you call.
You don’t need a perfect log before calling. What your provider wants is a rough picture: frequency, duration, and a sense of the trend.
When you do call, a triage nurse or midwife will often ask you to describe a contraction while they listen. That’s partly to gauge how far along you might be by how you sound and how easily you can speak through one. Reading from a written log gives the conversation a concrete starting point. “My last 8 contractions averaged 6 minutes apart and lasted about 55 seconds” is more useful than an estimate.
If you haven’t received specific timing instructions yet, ask at your next prenatal visit. Most midwives and doctors will tell you exactly which pattern to watch for and when to call.
How the Pattern Changes As Labor Develops
Contraction patterns don’t jump straight from irregular to 5 minutes apart. They follow a gradual progression over hours, often many hours for first-time parents.
Early labor contractions typically arrive every 15 to 20 minutes and last 30 to 45 seconds. Over time they tighten: every 10 minutes, then every 7, then every 5. Duration lengthens as frequency increases. The NHS describes early labour as the phase when the cervix begins to shorten and dilate; for many first-time parents, this phase stretches across several hours. The labor journey overview on this site walks through each phase from early labor through transition.
Braxton Hicks contractions (practice contractions) can complicate timing during this phase. They’re usually irregular, shorter, and often ease with movement, rest, or hydration. Real labor contractions tend to get longer, stronger, and closer together over time regardless of what you do. The pattern of change is the clearest way to tell them apart. If you’ve been tracking for 60 minutes and intervals are staying flat or lengthening, that picture differs from one where they’ve tightened from 10 minutes to 7 to 6 in that same hour.
What you’re watching for in your log is a trend. Intervals getting shorter, durations getting longer: that’s progressive labor. A log that holds flat at 10 minutes for 3 hours without increasing intensity tells a different story from one that has moved from 12 to 8 to 6 minutes in 90 minutes.
Some labors progress quickly, with contractions going from 10 minutes apart to 4 minutes apart in under an hour. ACOG’s guidance supports contacting your provider if the pattern is tightening rapidly, rather than waiting for the full 60-minute window in those cases. Rapid progression is worth reporting earlier, not later.
For a full breakdown of the specific thresholds most providers use, the 5-1-1 rule explained covers the pattern in detail, including common variations like 4-1-1.
Timing Contractions with an App or Online Tool
Tracking contractions by hand works, but doing the interval arithmetic is harder than expected once they’re 5 to 7 minutes apart and intensifying. Apps and browser tools handle the calculation automatically.
Contraction Timer & Tracker (Labor Companion) is available on iOS and Android. Tap when a contraction starts, tap when it ends. The app logs duration, interval, and intensity with each entry, shows hourly trend graphs, and flags when your pattern matches the 5-1-1 threshold, with a note to follow your provider’s specific guidance. When you’re ready to call your midwife or head to your birth place, you can share the full log in one tap.
If you’d rather try timing in a browser first, the free online contraction timer at Your Baby Journey works with no account or install required. It keeps a log in browser storage and lets you copy the data for sharing.
Before labor starts, the hospital bag checklist is worth checking so there’s no scramble when the pattern tightens. Having everything packed means you can focus on tracking rather than logistics.
Your provider’s instructions take priority over any timing rule. Labor Companion keeps the data organized so you have something concrete to share when you make that call.
Sources
- American College of Obstetricians and Gynecologists. How to Tell When Labor Begins. ACOG Patient FAQ.
- NHS. Signs that labour has begun. NHS.uk.
- Health Service Executive. Timing your contractions. HSE.ie.